Building a Morph Room with Morph Creator
We are delighted to announce that we have now launched the updated V2 software for our Morph Creator.
The software is easy to use but with all new software it can take a little practice to be able to work quickly and efficiently and to learn the short cuts. To help get up to speed with this I will run through how to build a Morph Room and will demonstrate some of the features and highlight some tips along the way.
First of all make sure you register on the creator and log in as this will enable you to save your drawing and submit the design for a quote at the end. It can be very frustrating to be building your bespoke item only to then have to start again as you weren't logged in.
Before you start have a practice of how to move about the Creater Grid. Your mouse scroll wheel lets you zoom in and out, the right button moves the grid and the left button allows you to Orbit around the drawing space/model. Alternatively you can use the directional arrows in the bottom right hand corner of the screen to move highlighted items. You can also use the coloured axis arrows to move highlighted items.
I have selected a nominal height of 2245mm for our room and will build a 3m x 3m room. The quickest way to build the room is by using the "Walls" feature in the box in the top left hand side of your screen.
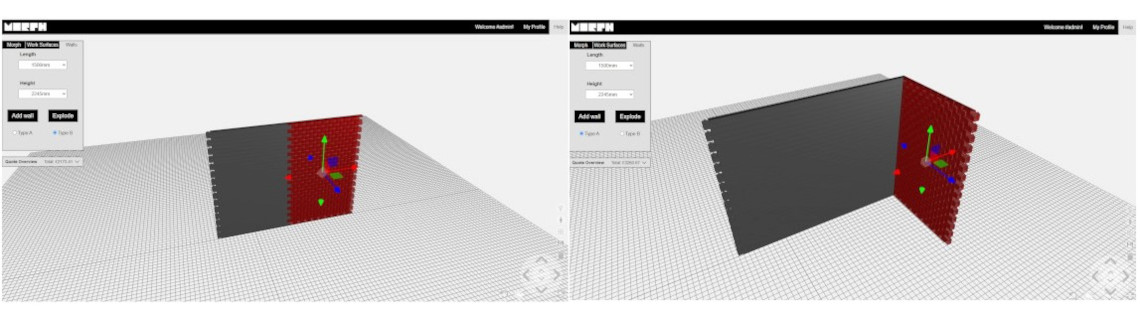
Select a length of 1500mm and a height of 2245mm, click in "Type A" and then press "Add Wall". The correctly sized wall will drop into place.
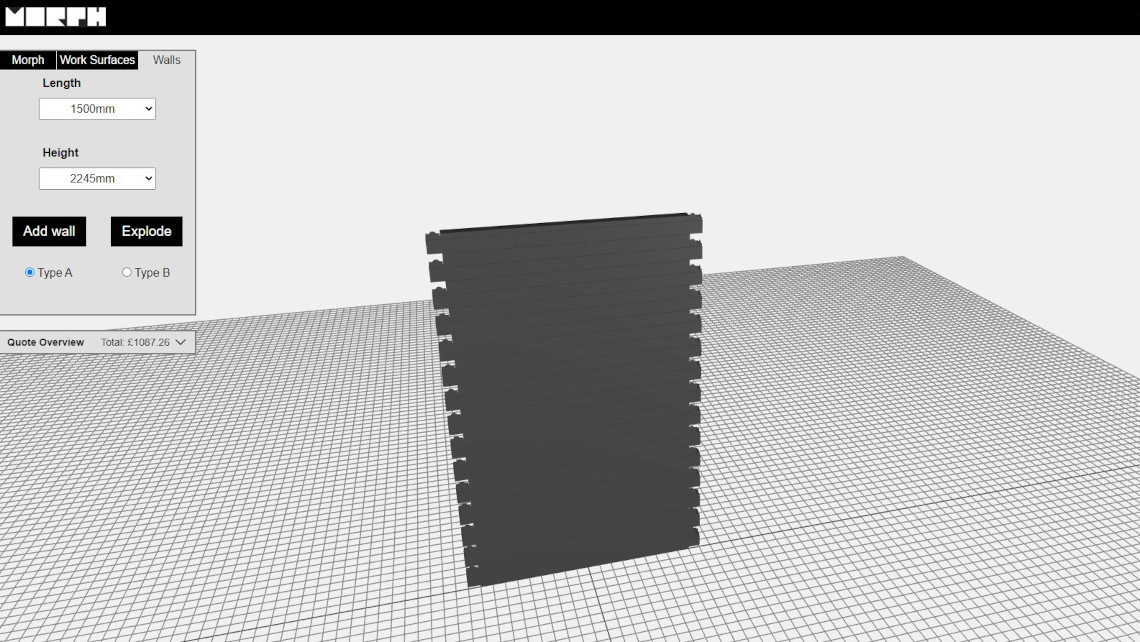
For the next section of wall you will use the same dimensions but this time select "Type B". You will need to alternate between "Type A" and "Type B" walls so that the wall sections lock together. This second wall will drop in on top of the first section and you use the red/blue/green Axis arrows to move the wall as required. you can also use the arrows in the bottom right hand corner of the screen.
The third panel will be "Type A" again and this time you will need to use the "Rotate" tool in the bottom right hand corner of the screen to turn the wall section through 90 degrees.
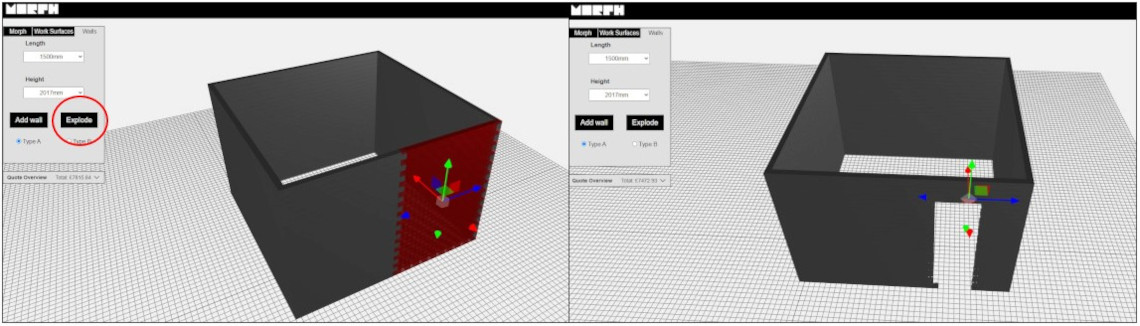
Carry on working round the room aiming to get 2 no. of the same sized wall sections on each side, thereby creating a room.

Once the room has been created you can then move onto creating a doorway. To do this select the panel where you want the door, highlight it and then press the explode button in the top left hand "Walls" box. This will break the wall section down into its individual bricks. Please note, do not explode the wall until you are sure the wall panels are in the correct position or it can take much longer to get into position once exploded. Once the section is exploded you can highlight individual bricks and delete them, thereby creating an opening. You can select more than one brick at a time by pressing ctrl as you select other bricks, so you can delete more than one brick at a time.
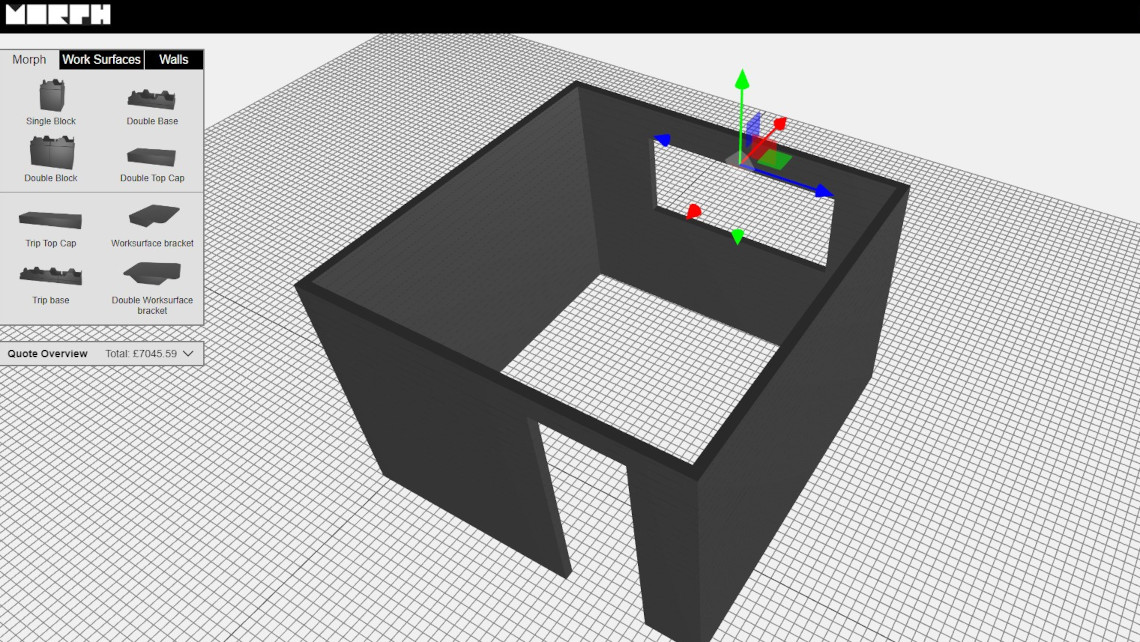
Once you have the opening created you will need to go back and infill the sides of the door with individual blocks selected from the "Morph" tab in the top left hand components box. Once you have the first single block in place the copy/paste feature (using CTRL "C" and CTRL "V") can greatly speed up the infill process. You can then place base sections in over the lintel of the door which will improve the aesthetics and on site these can be riveted to increase the strength of the lintel.

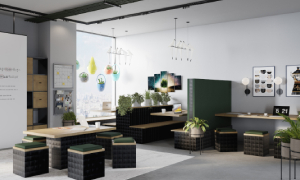
You can then look at any other adjustments you may want to make to your Morph Room such as adding windows, access for power/data or additional doors. Other accessories can be added to Morph Rooms such as acoustic panels, whiteboards, vinyl coverings etc but as options are so varied it is best to complete this aspect in your own design software by exporting as a 3D file and then importing into your preferred software.
Make sure you save your design and if you want to export as a 3D file you will need to submit your drawing via the "Quote Overview" tab and then you can see the 3D file options under the "My Profile" section in the top right of your screen.